Dramatic Contexts
By Kate Garrett
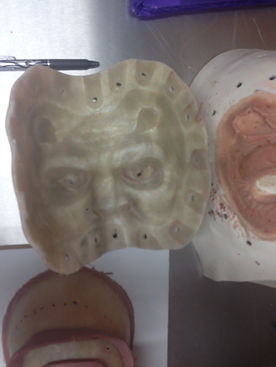
Mold Making.
Prosthetic piece on the positive cast.
Inside the negative cas- Grounding, touch downs and run offs present.
The hole sin the case aline up with those in the face cast so screws can be put through and tightened.
Below is an example of a Fibre glass mold made by Pete Tindall and Wayne Humpry.


Types of molds.
- Gypsum Molds (Stone)
- Silicone Rubber Molds
- Contoured or Conforming Molds
- Matrix Molds - supporting structure
- Laminating Molds - Fibre glass
- Resin Molds
- Epoxy Molds
- Urethance Molds
- Closed Molds
Silicone Rubber Molds.
1. You need to measure out equal parts of A & B- be carefull not to cross contamination as this will ruin the entire tub of product. Place a cup on the scales and zero out the weight. Measure 100g of part A the in a seperate cup measure out 100g of part B. If you go over/under keep a note of the exact weight and match it with part B.
2. Decant both parts into a bowl and mix throughly, you dont want to wisk this as air bubbles will affect the mould. You may wish to pigment the mold if you choose to do it now however avoid flesh colours as you will not be able to tell you prosthetic from its mold.
3. Pour the mixture from a long height as this will allow any air bubbles to pop on there way down, angle it off the sculpt inbetween this and the grounding up. It has a curing time of 8-10 minutes however do not leave it any longer than 15 minutes.
Demolding.
1. Check the entire surface before demolding any wet of sticky patches then leave it to cure for a few more minutes.
2. With your fingers ease the silicone away from the sides of the wall, the peel away the mold.
3. Wipe the mold with IPA or lighterfluid to clean and clay then may be left on the surface. However if using lighter fluid be aware this will swell the silicone so you will need to allow it to evaporate before casting from the mold.

For this method accuracy is the key! For this method I used rubber pro gel 10 and the total silicone neeeded is 200g. HEALTH AND SAFETY- Use Vinyl gloves for porection, latex will inhibbit the silicone
Silicone rubber molds - used for making flat pieces
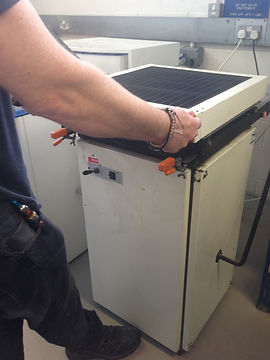
Laminating Molds.
Method.
1- Measure a sheet of plastic to the large marker and cut
2- Put the face cast on the vac forming layer in the machine
3- Place the sheet of plastic into the the vac forming machine and clamp the frame down
4- Pull the grill over and allow to heat the plastic between 25-30 seconds and no longer as it may start to burn
5- Push the grill back, switch the vac on and pull the leaver to move the inside layer upwards to the plastic to create the mould, allow to stand for 30 seconds to cool
6- Swtich the leaver at the front on the machine to blow the air and push the mould out of the plastic, push the leaver on the right back
7- Remove the plastic from its frame and take out the life cast
8- Place the plastic into bowls so the face isnt touching the surface
9- Mix up a bowl of plaster and pour into the mould, allow to set.
10- Remove from the plastic and you have your positive cast ready for sculpting onto.


Closed Molds.
Closed molds are a type of mold that to make the prosthetic piece the positve and negative molds are pushed together which enclose the piece inside.
Making the Negative cast.
1. Once you sclupted piece is completed cover it in a release agent, ie vasline. Then mix up a plaster batch up as learnt in a previous unit, remember to add the plaster to the cold water to make a thin paste for your detail layer then add more plaster to thicken it up to sculpt over your clay sculpt covering all the grounding up and being 2 cm above the highest point. You want a flat top so it will not rock when filling later.
2. Once built up the negative cast on top of the positive leave to dry, the plaster will heat up then cool. To check run your finger with pressure over the top if you get white powdery residue it isn't dry leave longer.
3. Demoulding, for this you need to pull the positive and negative casts away from each other, if sturggling you may need to leaver one side. Then clean out the clay and tidy up the cast where nessisary.
Making the piece.
1. Prep the the mould to suit th ematerial you are using.
2. Make up your chosen material,ie. melt the geltaine or mix th silicone parts.
3. Pour into the negative mould and push the positive cast into it and apply pressure and leave to cure.
Using different materials.
Silcione: If filling with silicone you need to prep the negative part of the cast with vasline and then 3-5 Layers of cap plastic and IPA mix. Then pour the silcione mix in (made the same as for flat pieces, once again softening depends where on the boyd you will be using it), allow to cure then pull the molds apart and apply 2 more layer of the mix to seal the piece. Remove by using talcum powder.
Gelatin: Prep the mould vasline then pour the melted geltaine into the negative mould and push the postive cast in and allow to cure. To removed peel away from the cast. If you are happy with the piece seal it with sealer this will stop colour absorbing into the gelatin.
Demoulding.
1. Pull apart the two parts of the cast and remove the piece chosing the method right for the material.
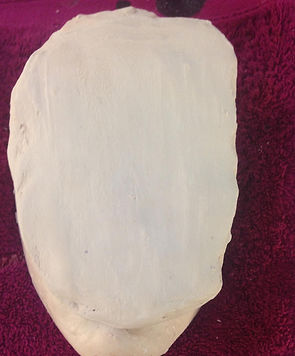

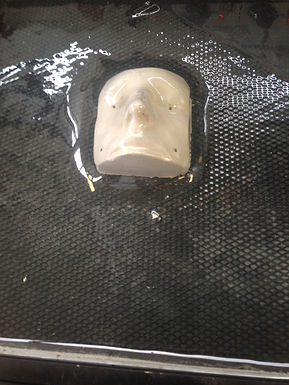
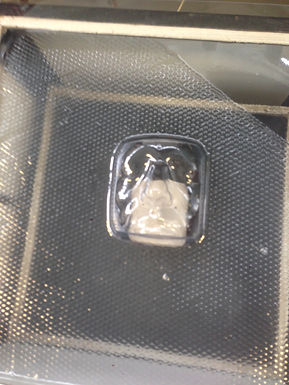
Example of a closed mold drying.
Example of the flat top on a closed mold.

Left- Negative
Right - Postive